How to install Ozeki Camera Recorder
Step 1 - Download Ozeki Camera Recorder
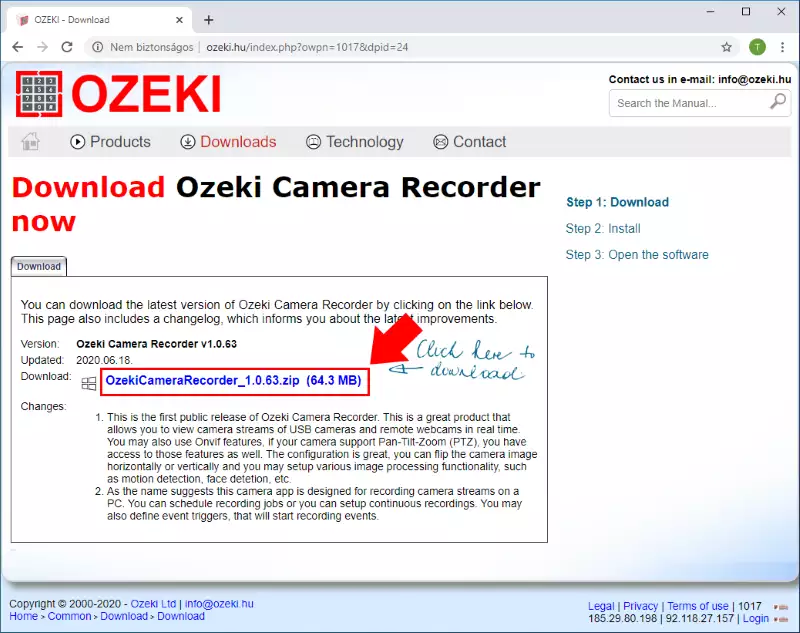
The latest release of Ozeki Camera Recorder can be downloaded from the following Downloads page: http://camera.ozeki.hu/p_716-download-camera-recorder.html To download the installer in compressed format, you need to click on the first OzekiCameraRecorder_x.x.xx.zip link as Figure 1 shows below. We recommend you to always download the latest version. This version always contains all the currently available features and improvements.
Step 2 - Extract the downloaded file
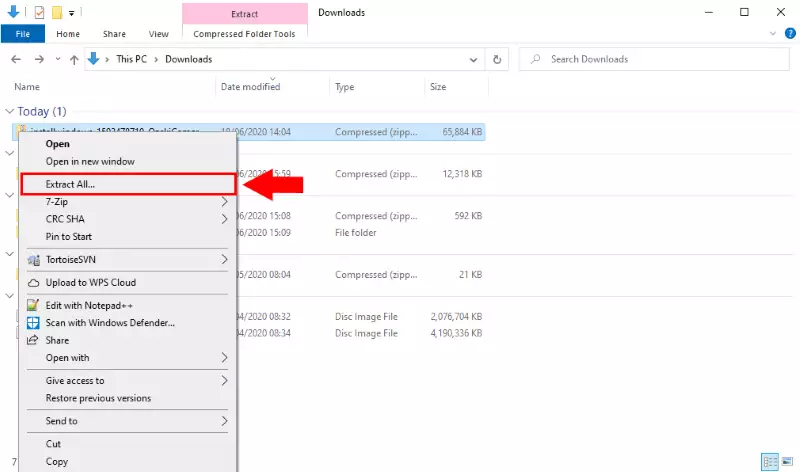
When the download finished, you have to extract the compressed file to be able to run the installer of the software. For that, please open the Downloads folder on your computer. Then, as you can see it on Figure 2, right click on the file and select Extract All.... By doing this, you will get the executable installer of Ozeki Installer.
Step 3 - Run the installer
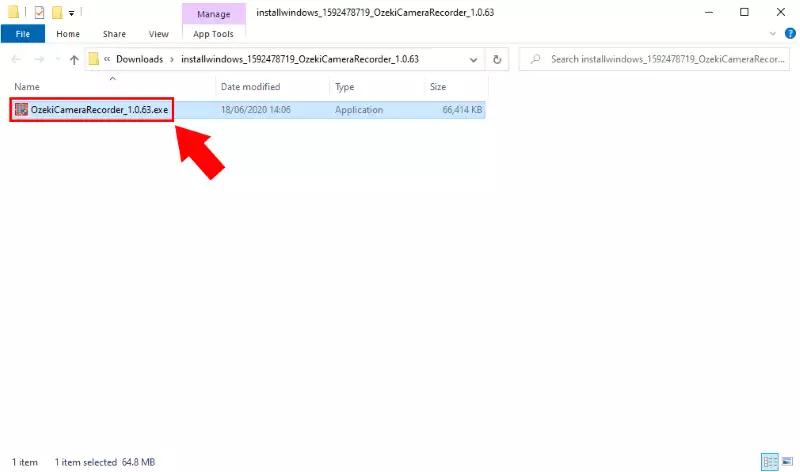
After you extracted the .zip file, please open the newly created folder, and just like in Figure 3, just click on the executable file to start the installation process.
Step 4 - Install Ozeki Camera Recorder
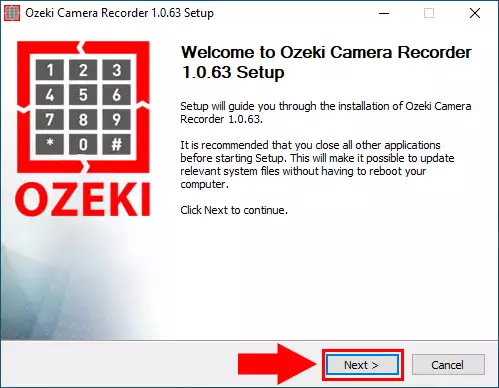
As soon as you clicked on the .exe file, the installer starts with a welcome screen (Figure 4). All you have to do here is to click Next to continue the installation.
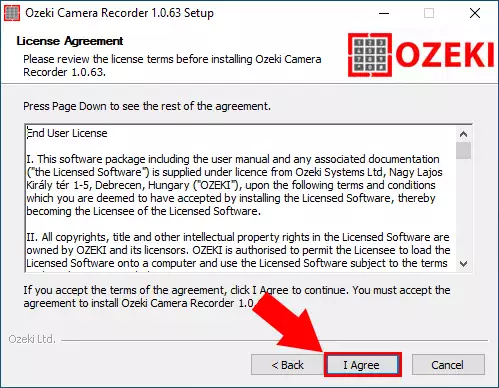
To install Ozeki Camera Recorder on your computer, you must accept the terms of the License Agreement. Please review them then as Figure 5 demonstrates, click 'I Agree' button to continue.
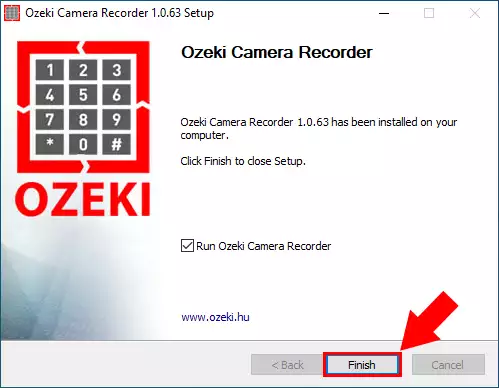
After the installation process is finished the Ozeki Camera Recorder service will start automatically in the background. To run Ozeki Camera Recorder on your web browser, just check Run Ozeki Camera Recorder as you can see it on Figure 6 and click Finish.
Step 5 - Ozeki Camera Recorder desktop
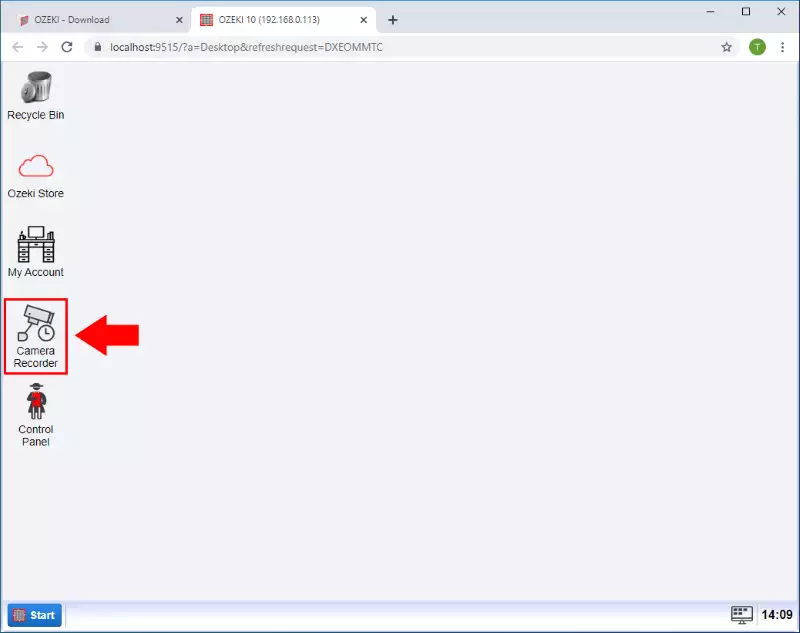
The home page of Ozeki Camera Recorder is a desktop, where you can find the Camera Recorder application's icon as Figure 7 shows it. Click on the Icon to open the application.
Step 6 - Add new USB camera to Ozeki Camera Recorder
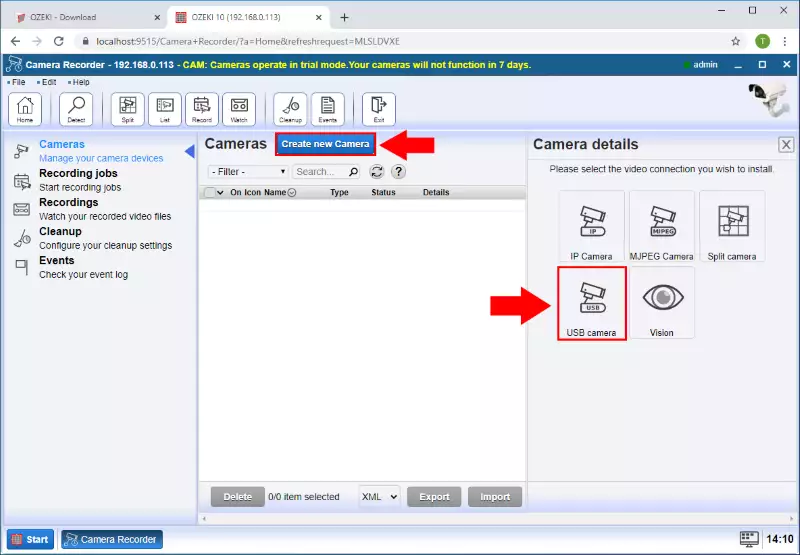
To add new USB camera to the Camera Recorder select the Create new Camera button on the Camera Recorder control page and than select USB Camera from the Details as you can see on the Figure 8.
Step 7 - Select USB device
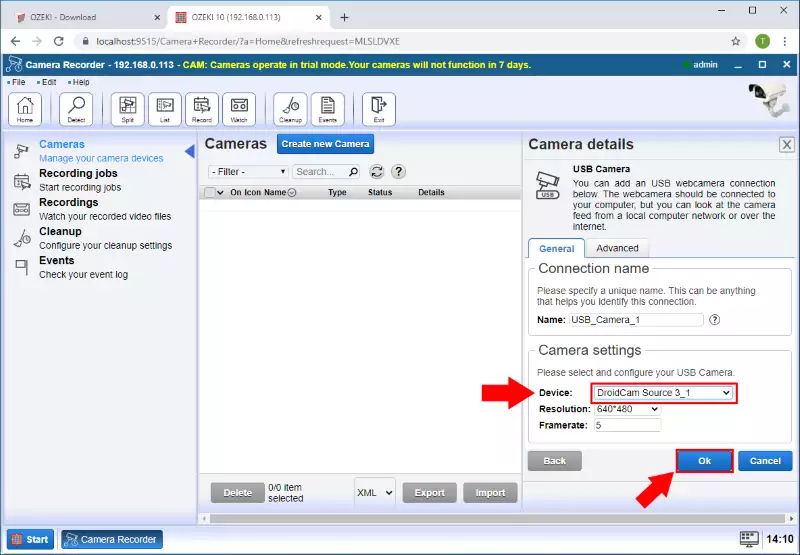
In the camera details page select the USB camera what you want to use and click on the OK button (Figure 9).
Step 8 - Camera connection created
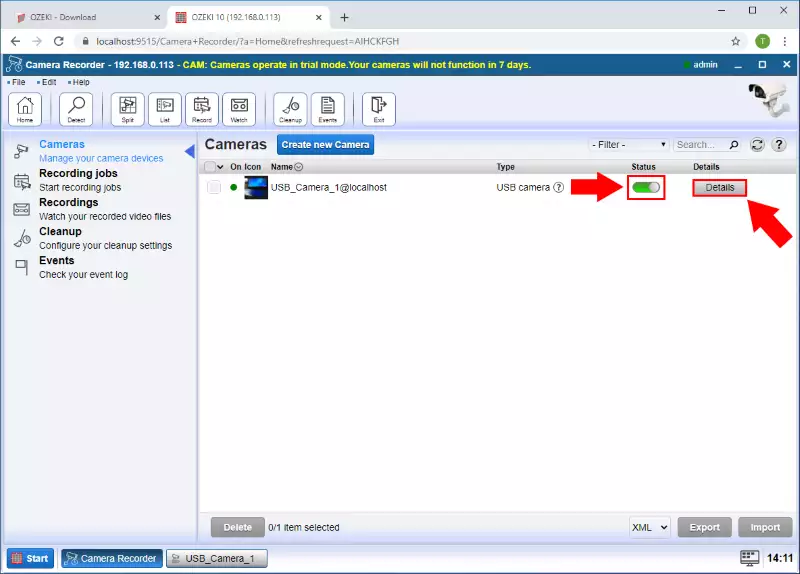
In the cameras list the new USB camera is appeared and you can see if the status is connected. If it is not connected click the switch. After it you can open the camera by click on the Details button as Figure 10 shows it.
Step 9 - Test USB Camera picture
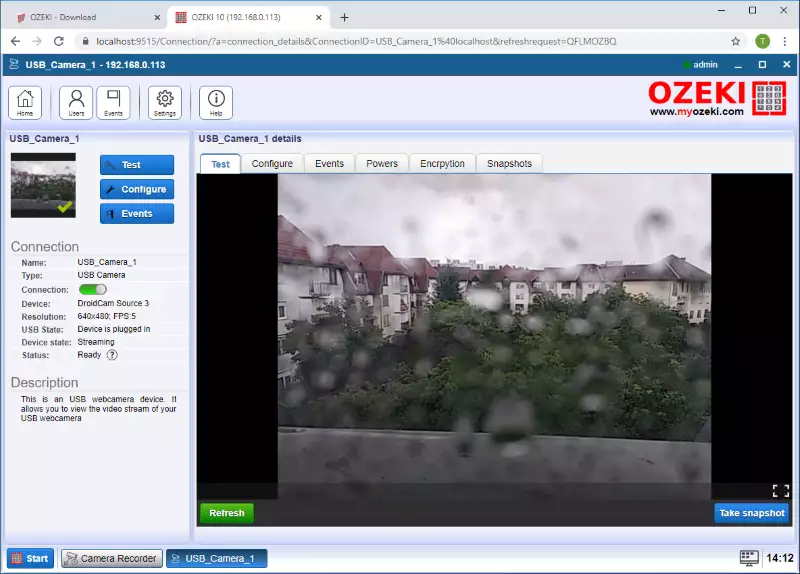
As you can see on the Figure 11 the USB Camera's picture is shown in the Test tab.

 Sign in