How to take camera snapshots
This simple guide is about to show you how to take snapshots from your camera in Camera Recorder. The snapshots can be taken manually or you can also set a time interval when the system automatically takes a snapshot and stores it for you. The snapshots are always available for you to preview or download them.
Step 1 - Open your camera connection
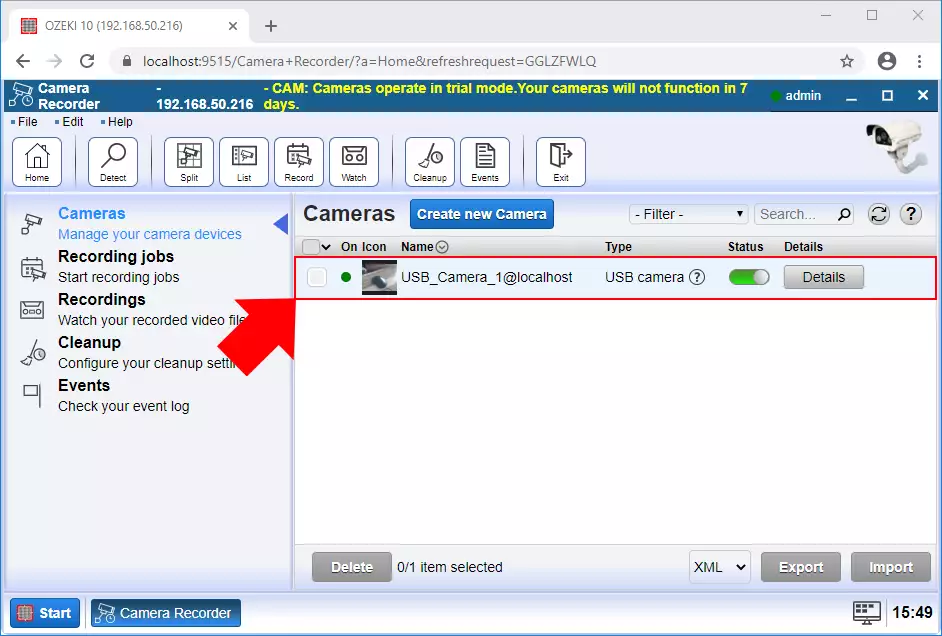
The first step of taking a snapshot is to open a camera connection that you would like to take a picture from. This can be done easily by selecting the Cameras menu in the Camera Recorder and here, as Figure 1 shows it, just click on the camera connection from the list of available connections.

Step 2 - Take immediate snapshot from the camera
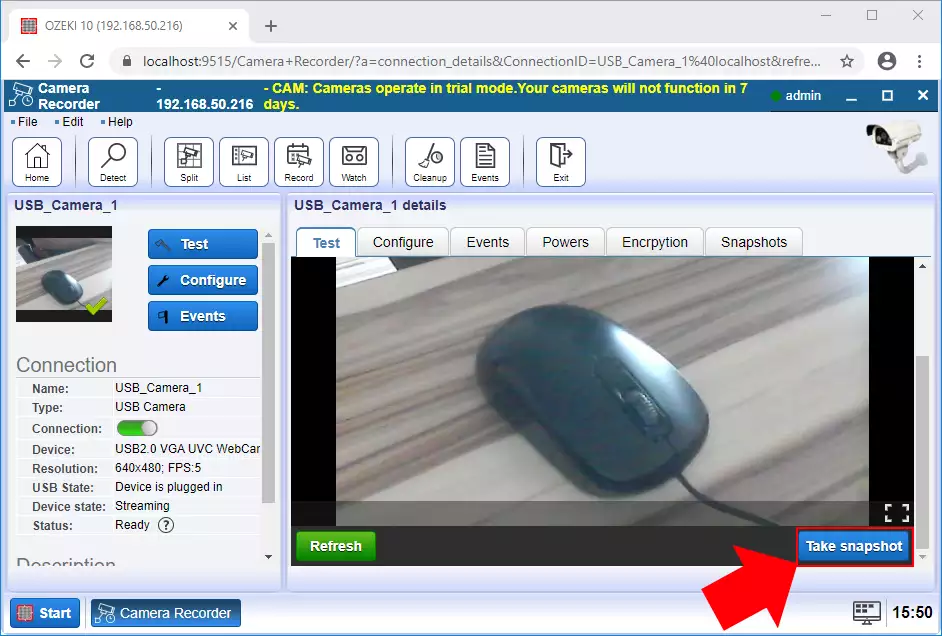
In the menu of the camera connection, the main window shows the image of the camera. Here, you can easily monitor, what your camera sees. To capture a moment that you would like to store as an image, just click on the Take snapshot button below as you can see it in Figure 2.

Step 3 - Set periodic snapshot capturing
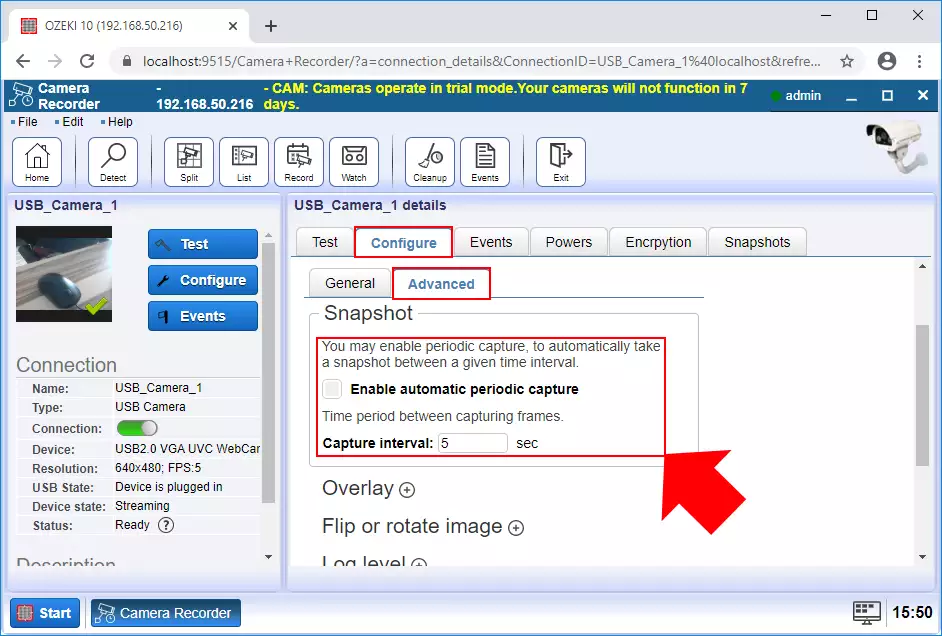
Camera Recorder also ensures the ability to take periodic snapshots of your camera. To be able to do this, just select the Configure tab in your camera connection, and here, click on the Advanced tab. As Figure 3 demonstrates it, in the Snapshot menu, you can enable the periodic capture and also set a time interval in seconds between the frame captures.

Step 4 - Watch all taken snapshots
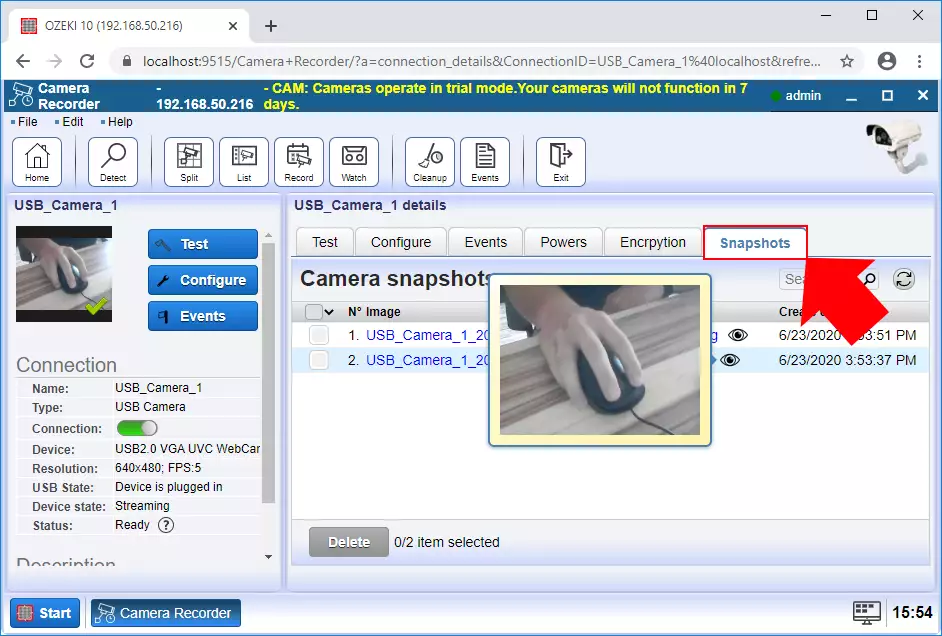
Every snapshot that you captured from your camera can be viewed in the Snapshots tab (Figure 4). Here, you can see the list of the snapshots, with their name and a timestamp of the creation time. To preview a snapshot, just point to the eye icon with your mouse, and a little picture box is going to appear with the snapshot. You can simply download a snapshot by just clicking on the name of the snapshot that you would like to download.


 Sign in