How to send email when barcode detected
Ozeki Camera Recorder provides you the feature to use your camera as a barcode scanner and send the detected barcode via an e-mail message by using an e-mail connection. The following document contains a step by step guide which shows how you can create an e-mail connection to receive the detected barcodes and how you need to configure the barcode scanner to send the detected barcodes as an e-mail message.
Step 1 - Open Control Panel
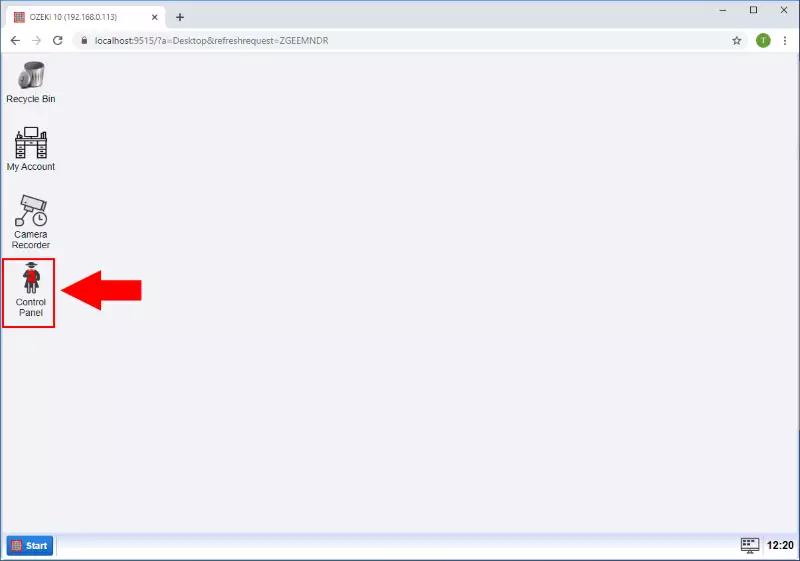
In the first step, you need to open the Control Panel. You can do this by opening Ozeki in your web browser, and on the Desktop, click on the icon of the Control Panel as you can see it in Figure 1.
Step 2 - Create new connection
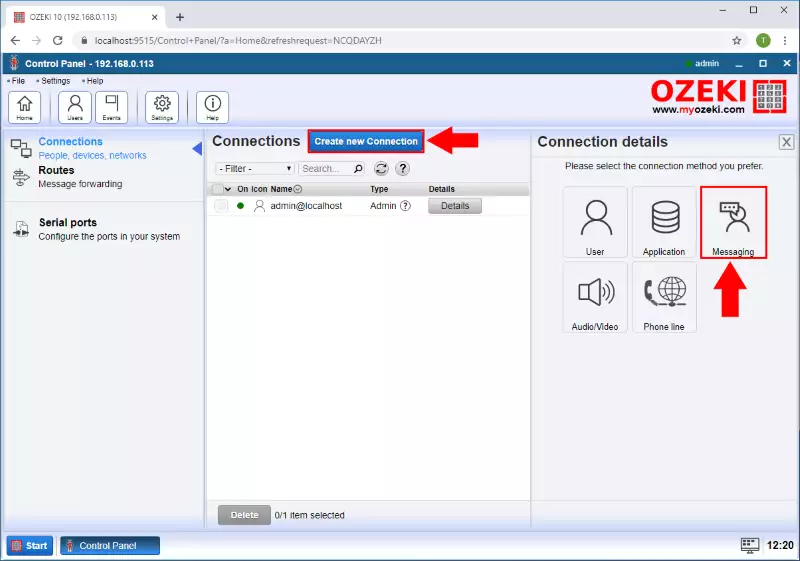
In the Control Panel application, you need to create an SMTP connection to handle the e-mail messages from the motion detector. To do that, first, click on the Create new Connection, and here, you need to select the Messaging option as Figure 2 shows it below.
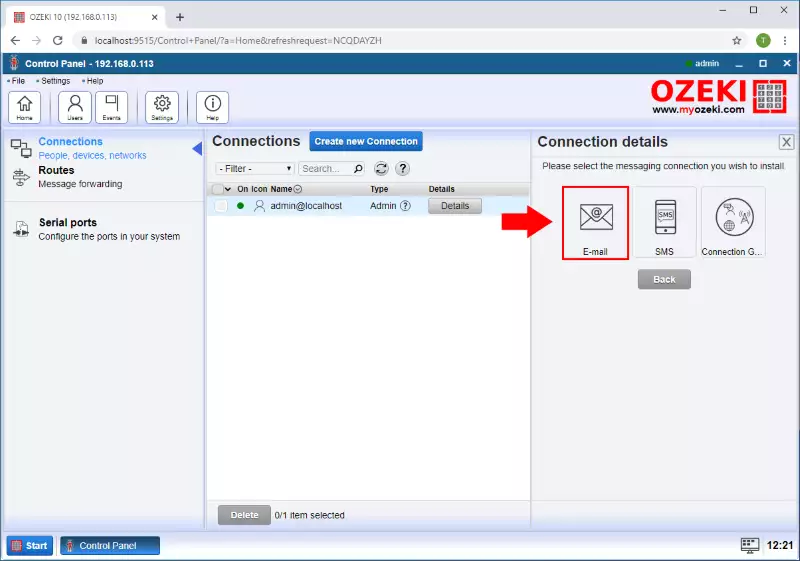
Next, you will be able to see all the messaging connections that you can create in Ozeki. To follow this guide, now you need to create an e-mail connection, so at this point, just click on E-mail like in Figure 3.
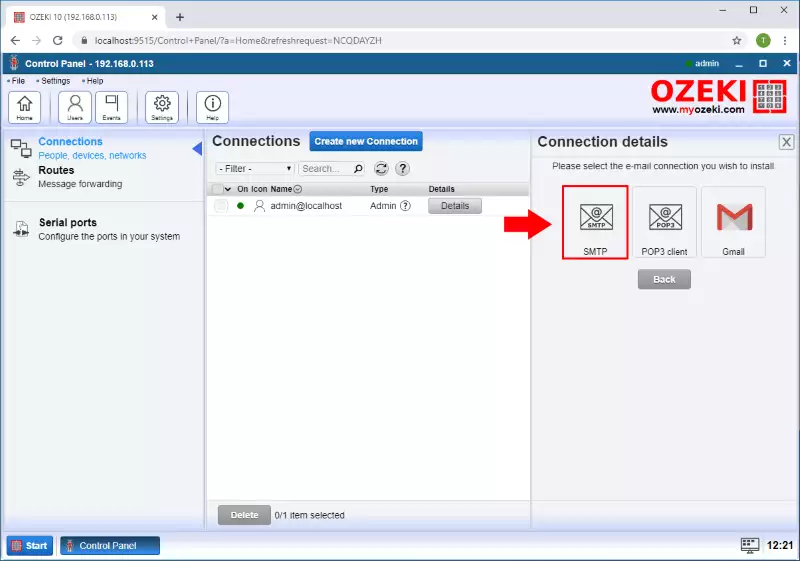
The next menu shows the available e-mail connections for you. Here you can create a POP3 client or a Gmail connection, but this guide requires an SMTP connection. So, now just click on the SMTP icon (Figure 4).
Step 3 - Specify connection details
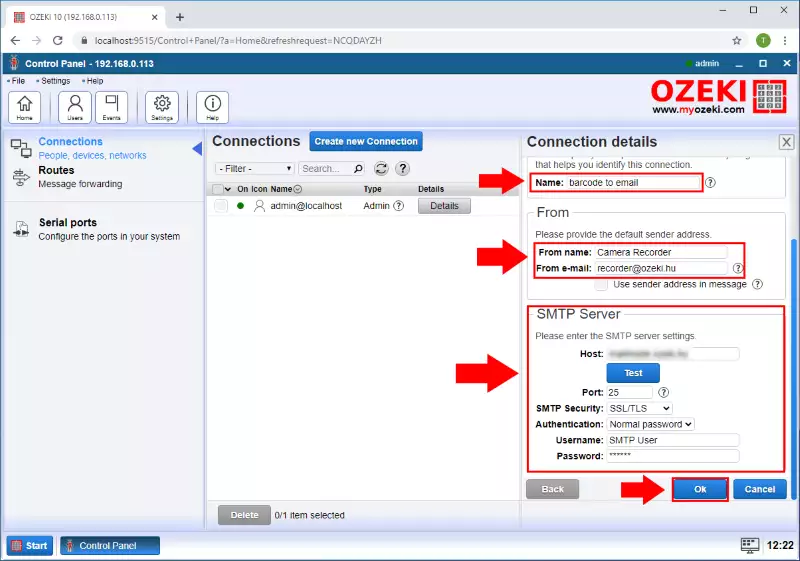
Before creating the SMTP connection, you have to specify some details in the Configuration menu. First, you need to type a name for the connection. Then, you need to provide details about the sender as you can see it in Figure 5. These details will be used when sending the e-mail. Lastly, you need to specify the details of the SMTP server, that the connection is going to connect. If you entered all details, you can just click on OK.
Step 4 - Open Camera Recorder
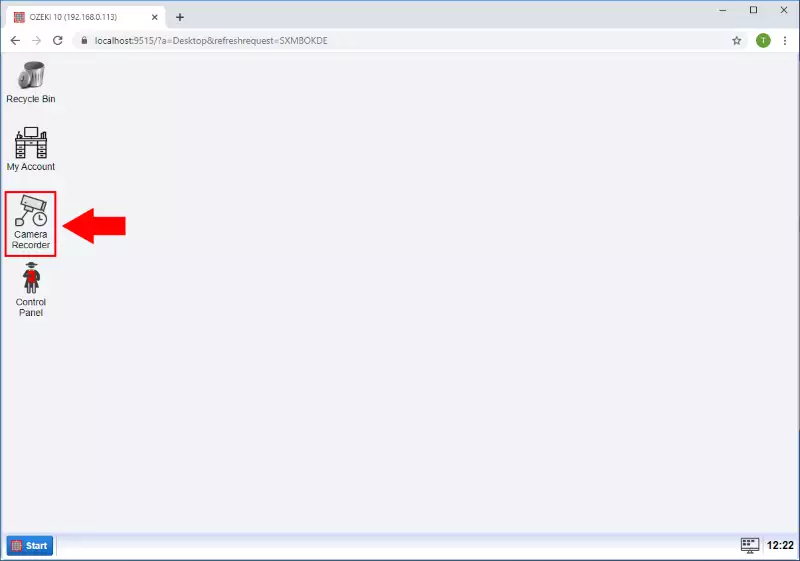
After you created the e-mail connection, now you need to establish the barcode scanner connection. To do that, just navigate back to the Ozeki Desktop, and here, just select the Camera Recorder application (Figure 6).
Step 5 - Create new camera connection
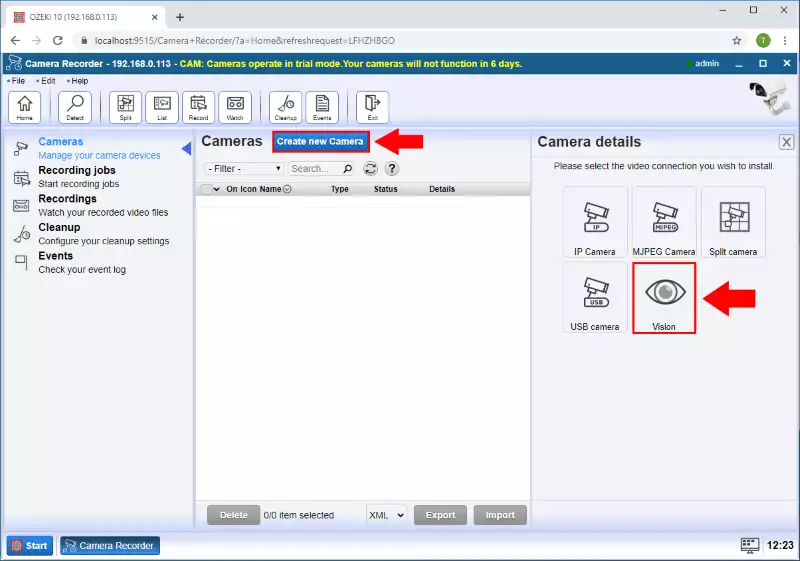
In the Camera Recorder application, to create the barcode scanner, first click on Create new Camera, and from the available options, select the Vision as Figure 7 demonstrates it.
Step 6 - Create new barcode scanner
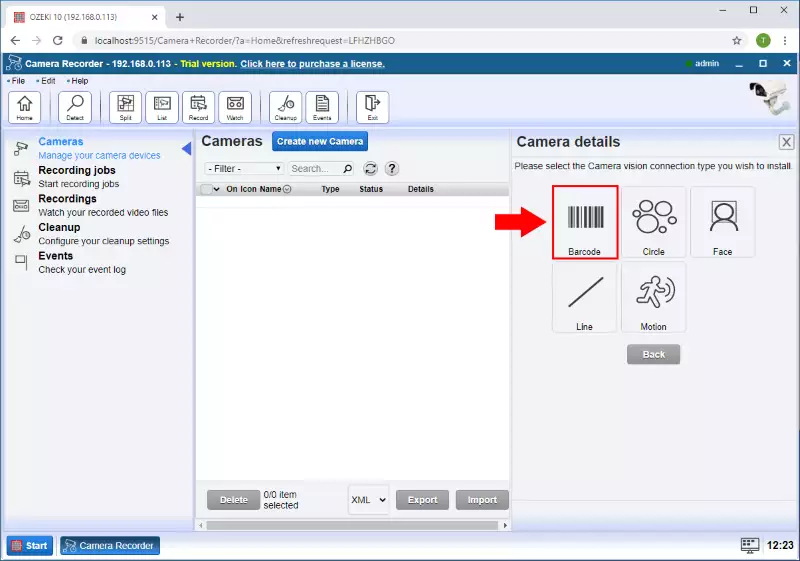
The Vision menu contains all the computer vision connections, that you can create in Camera Recorder. Now, this guide requires you to create a barcode scanner, so at this point, you have to click on Barcode (Figure 8).
Step 7 - Configure barcode scanner
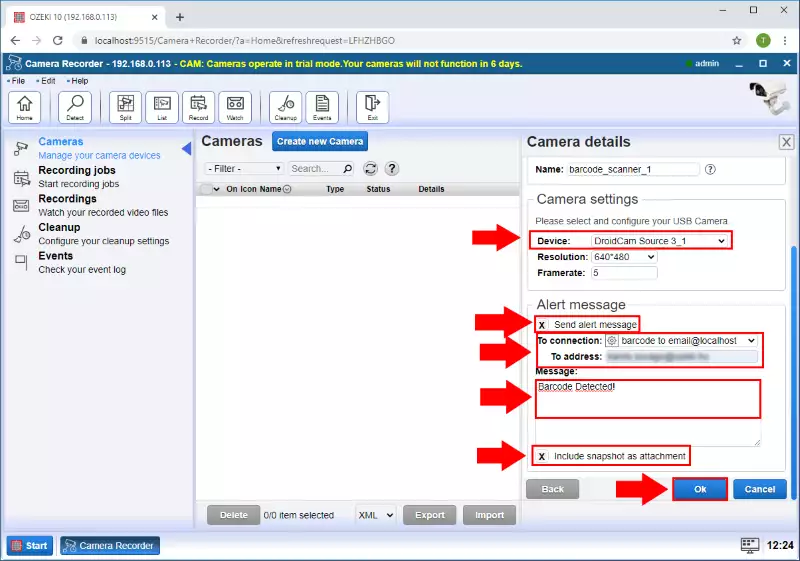
Next, you need to define the details for the barcode scanner. First, you need to select the camera, that you would like to use as a barcode scanner. Then, check the Send alert message option, and select the e-mail connection that you created before. At this point, you need to type the e-mail address where you want to send the alert and type the message itself. Lastly, check the option that ensures that the barcode will be sent as well, as an attachment (Figure 9). Finally, just click on OK.
Step 8 - Barcode scanner created
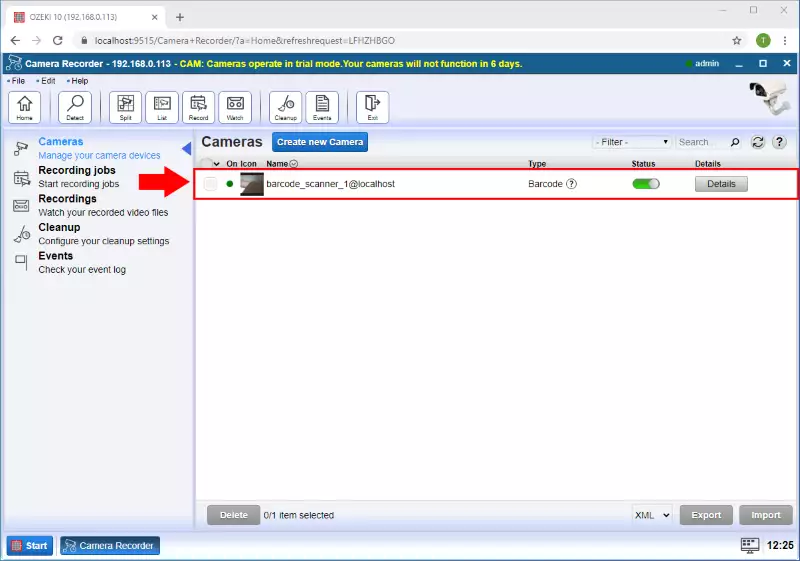
Your barcode scanner is going to appear in the list of the camera connections. To be able to see that, just select the Cameras menu like in Figure 10.
Step 9 - Barcode detected
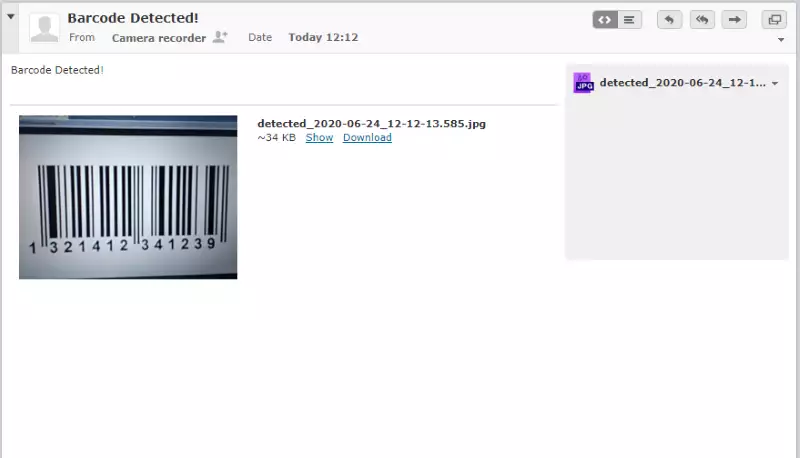
If you completed this guide successfully, the barcode scanner can detect barcodes, and send them to the selected e-mail address. Figure 11 demonstrates that, you can see how the e-mail looks like that just received from the barcode scanner connection.

 Sign in